 Duluth Water Leak Detection ProsWater leak detection · Duluth, GA · Open 24 hours
How Water Leak Detection Works in Duluth, GA
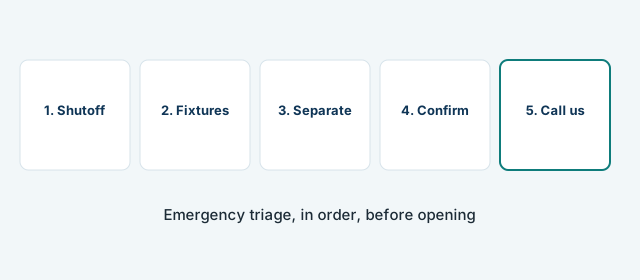
Water leak detection in Duluth, GA works in four steps: check the meter, isolate inside or outside, narrow the area with acoustic and thermal checks, and mark the leak point. We do not open a floor or wall first. We mark the location, then explain what repair would open.

Step 1 — The meter test you can do yourself
Turn off every tap, appliance, toilet cistern, and irrigation control. Note the meter reading, including the leak indicator if your meter has one. Wait without using water — 30 to 60 minutes is a common check, and up to two hours gives a clearer result for a slow leak — then read the meter again. If it has moved, water is escaping somewhere. If it has not moved, the problem may be usage, a single appliance, or a billing question rather than a concealed leak. Gwinnett County Water Resources publishes the same guidance for its customers, and the FAQs page links to it.
Step 2 — Isolation: inside or outside?
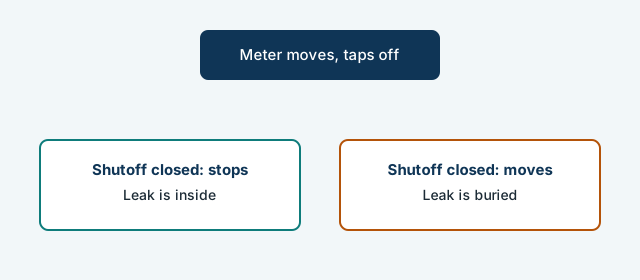
Close the house shutoff valve. If the meter stops, the leak is inside the house — a water-line, wall, slab, or ceiling question. If the meter keeps moving, the leak is likely on the buried line between the meter and the house — an underground question. That one test decides which service answers your question, and it is the test the inspector will start from when you call.
Step 3 — Narrow the area
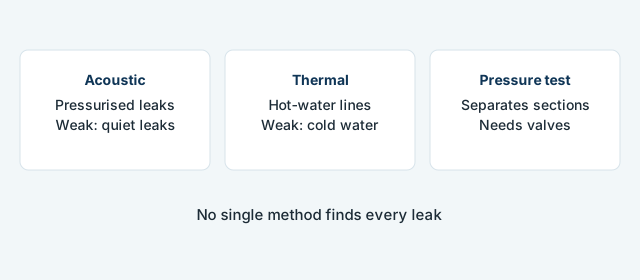
With the side of the leak known, the inspector uses the checks that fit the symptoms. Acoustic listening picks up the sound of pressurised water escaping, but is affected by depth, background noise, and pipe material. Thermal imaging shows temperature patterns and works best on hot-water lines; it is weaker on cold-water leaks and it does not see through walls. Moisture readings show how far damp has spread. Pressure testing separates sections of pipe. Tracer gas and camera checks exist for cases where the standard checks cannot narrow the area. No single check finds every leak, and a careful inspection will say so when it cannot confirm a location rather than guessing.
Step 4 — Mark the location and explain the next step
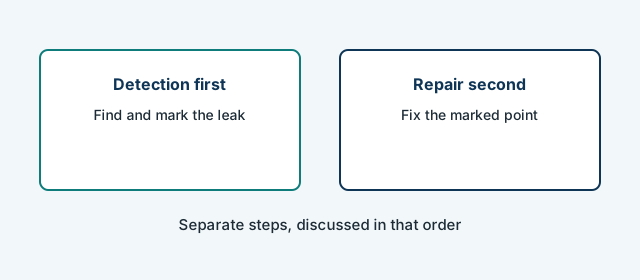
The point found is marked and explained in plain terms: what was found, how it was narrowed, and what the next step is. Detection and repair are separate steps. What happens next — repair, rerouting, or referral to another trade — depends on the leak and is discussed after the location is known, not sold before it. Ask what any repair would open up and what it costs before any work starts.
Detection versus repair, honestly
| Detection does | Detection does not do |
|---|---|
| Find and mark the location of a hidden leak | Repair the pipe, reroute a line, or replace a section — those are separate decisions |
| Explain how the location was narrowed and what the checks showed | Promise a location when the checks cannot confirm one |
| Separate an inside leak from a buried-line leak | Cover gas, roof, pool, sewer, or drain problems |
| Give you a clear next step after the location is known | Guarantee a price, a response time, or a result before the inspection |
Safety first
If water is spreading, a ceiling is sagging, or you hear a steady rush inside a wall, shut off the main water valve if it is safe to reach, keep clear of wet electrical outlets and switches, and call. Do not touch wet electrics. If you smell gas, leave the property and call your gas utility or emergency services — that is a different emergency and is not handled by this number.
Visual guides
Diagrams that summarise the pages above — all are illustrations, not photographs of jobs.
Call (770) 214-4798
Call to discuss what you are seeing and arrange a leak inspection.